This project was originally shared on Make: Projects.

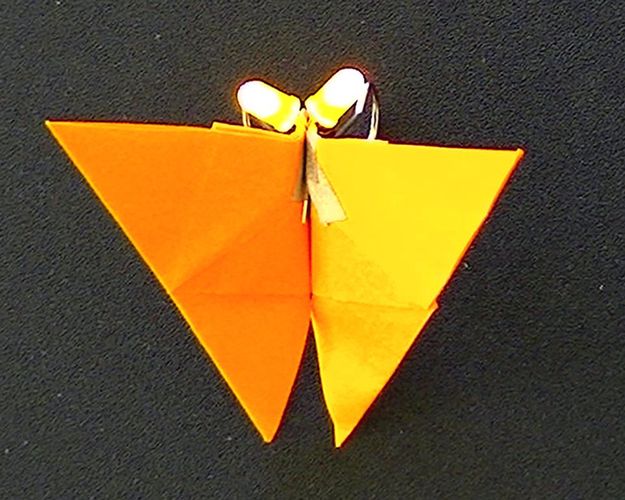
Fold a simple butterfly using origami and then add LEDs to create light-up antenna. This is a fun way to learn about and build circuits while also practicing the precision of origami and being creative.
This project is based on the Luna Moth from The Big Book of Maker Camp Projects.
What You’ll Need
- Origami paper, any color
- Two 5mm LEDs, any color
- 3-volt coin battery (CR2032 or CR2025)
- Maker Tape or ¼-inch copper tape with conductive adhesive
- Binder clip
You can find all these materials in the Make: Origami Paper Circuits Kit.
Initial Folds: Place the paper in front of you with the points facing in compass directions to make a diamond. Create a mountain fold, folding the bottom point to the top point. Unfold. Turn 90 degrees, and repeat.
Create Creases: With the paper returned to the diamond orientation, fold the top point down to the center of the paper. Repeat for the other points. Unfold. Flip the paper over and orient as a square.
More Creases: Fold the top to the middle line. Repeat for the bottom. Turn 90 degrees and repeat.
Form the Wings: Open the top folds. Take a point toward the center and fold it downward, reversing the folds and aiming the point outward and to the side. Do the same for the other side. Then do the same for the bottom. At this point, you should have a six-sided shape.
Form the Body: Rotate 90 degrees. Fold the points downward and out to the side, along the diagonal creases. Flip the paper. Fold the top down to meet the bottom of the square. Fold the right side over along the middle, creating an isosceles triangle.
Final Folds: Holding the top of the triangle, at the right angle, fold the other points upward and out, forming wings. The center channel should be wider toward the top, and coming to a point slightly past halfway along the butterfly. Crease well.
Add LEDs: Flatten the moth. Inside the folded body, arrange the first LED on the left so that the
positive lead (the longer one) is to the left and the negative lead is to the right, with the LED roughly centered between the center and diagonal fold. Allow the LED to hang off the end of the butterfly by a bit. Use Maker Tape to attach each lead, taking care not to let the tape for the negative and positive leads touch. This will short the circuit.
Place the second LED with the negative lead to the left and the positive lead to the right (the opposite of the first LED), with the LED roughly centered between the center and diagonal fold. Attach as you did the first LED.
You want the two positive leads and the two negative leads to be able to touch when the butterfly is folded together.
Wire the Positive Lead: Place a piece of Maker Tape so that it attaches to the positive lead of the right-most LED and wrap it around to the back of the butterfly. Fold a piece of tape into a loop with the adhesive facing out. Place that on the tape you added to the back. Place the battery positive side down onto the folded tape and press until well attached.
Connect the Negative Lead: Attach a piece of Maker Tape from the negative lead of the left-most LED and wrap around to the back of the butterfly. Carefully direct the tape to the top of the battery (the negative side), create a fold as needed. Make sure that the tape from the negative lead does not cross the positive. Press well.
Check Your Connections: Use your fingernail to make sure the Maker Tape is well connected to the leads of the LEDs. Ensure that the positive and negative sides of the circuit never cross. Make sure the positive and negative leads of the LEDs touch when the butterfly is folded so that the circuit is closed. If needed, adjust the LEDs by carefully bending them away from one another. Use a binder clip to hold the butterfly together.
Or check out my Maker Camp video workshop on origami circuits for this projects and more.
Did you enjoy this project? Get over 100 other projects perfect for home, school, clubs or camps! Check out The Big Book of Maker Camp Projects.


